Integrate Kapa into Algolia search bar
This tutorial shows you how to add Kapa's Ask AI functionality to your Algolia search interface. By following these steps, you'll create a seamless experience where users can search your content and ask questions directly through the same interface.
Why integrate Kapa with Algolia?
- Users can quickly switch to asking Kapa when search results don't provide what they need
- It gives Kapa greater visibility in your interface, encouraging adoption
- It provides a natural transition between searching and asking
Prerequisites
Before you begin, make sure you have:
- An existing website with Algolia search implementation
- A Kapa account with an active project
- Basic knowledge of HTML, CSS, and JavaScript/React
This tutorial assumes you're using React with Algolia's InstantSearch library. The concepts can be adapted to other frameworks, but you'll need to modify the code accordingly.
Implementation
Create a custom "Ask AI" button
First, create a custom button component that appears in your Algolia search results that:
- Retrieve the current search query from Algolia
- Open the Kapa modal when clicked
- Pre-fill the query and submit it automatically
Here's an example implementation using React and Algolia's InstantSearch:
import React from "react";
import {
  useInstantSearch,
  InstantSearch,
  SearchBox,
  Hits,
  Highlight,
  PoweredBy,
} from "react-instantsearch";

// Custom Ask AI button component
function AskAIButton() {
  // Get the current search query from Algolia
  const { uiState } = useInstantSearch();
  const { query } = uiState["instant_search"];

  // Handle button click by opening Kapa with the query
  const handleClick = () => {
    window.Kapa.open({ query, submit: true });
  };

  // Only show the button when there's an active query
  return query ? (
    <button className="ask-ai-button" onClick={handleClick}>
      <span className="ask-ai-text">Ask AI about "{query}"</span>
    </button>
  ) : null;
}
In this example, the index name is instant_search. Replace this with your
actual index name.
Integrate the button with your search UI
Next, place the button within your existing Algolia search interface. The
following shows an example of how to add it above your search results. Adjust
the attributes and structure of your Hit component as necessary.
function Hit({ hit }) {
  return (
    <div className="hit-item">
      <Highlight hit={hit} attribute="title" className="hit-title" />
      <p className="hit-description">
        <Highlight hit={hit} attribute="description" />
      </p>
      <div className="hit-path">{hit.path}</div>
    </div>
  );
}

// Your main search component
export function SearchInterface() {
  return (
    <InstantSearch
      searchClient={searchClient}
      indexName="instant_search"
      routing={true}
      insights={true}
    >
      <div className="search-container">
        <div className="search-panel">
          <SearchBox placeholder="Search" autoFocus />
          <div className="search-header">
            <PoweredBy />
          </div>

          {/* Position the Ask AI button above search results */}
          <AskAIButton />

          <Hits hitComponent={Hit} />
        </div>
      </div>
    </InstantSearch>
  );
}
Style your Ask AI button
Add CSS styles to make the button visually appealing and consistent with your search interface. Use the following CSS as-is, or use it as a starting point and adjust it to your needs.
/* Ask AI button styling */
.ask-ai-button {
  display: flex;
  align-items: center;
  justify-content: center;
  width: 100%;
  margin: 12px 0;
  padding: 12px 16px;
  background-color: rgba(91, 76, 254, 0.1); /* Background color */
  border: 1px solid rgba(91, 76, 254, 0.2);
  border-radius: 8px;
  font-size: 14px;
  color: #5b4cfe; /* Text color */
  cursor: pointer;
  transition: all 0.2s ease;
  position: relative;
  overflow: hidden;
}

.ask-ai-button:hover {
  background-color: rgba(91, 76, 254, 0.15);
  border-color: rgba(91, 76, 254, 0.3);
  transform: translateY(-1px);
  box-shadow: 0 2px 5px rgba(91, 76, 254, 0.1);
}

.ask-ai-button:active {
  background-color: rgba(91, 76, 254, 0.2);
  transform: translateY(0);
}

.ask-ai-text {
  font-weight: 600;
  display: flex;
  align-items: center;
}
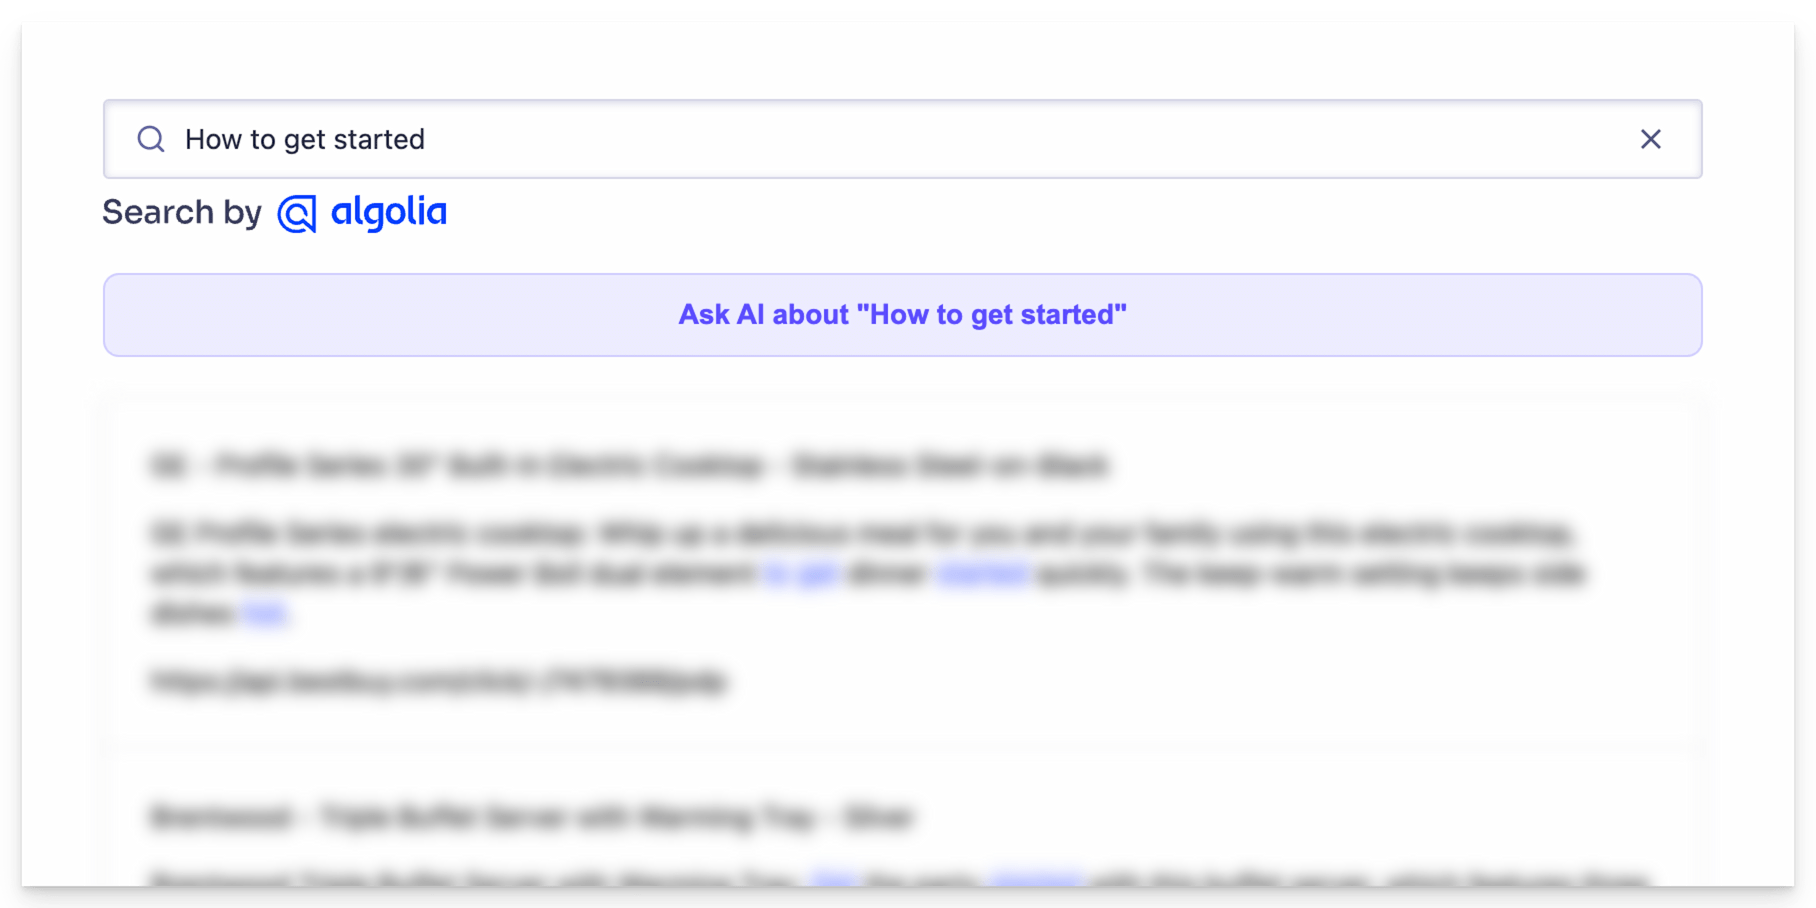
How it works
When a user enters a search query in Algolia:
- The Ask AI button appears above the search results
- If the search results don't satisfy the user, they can click "Ask AI about [query]"
- The Kapa modal opens with the search query pre-filled
- The query is automatically submitted to Kapa
- Kapa provides a conversational response to the query
Troubleshooting
Button doesn't appear
- Verify that query is correctly extracted from uiState
- Check if the index name in
uiState["instant_search"]matches your actual index name - Ensure Algolia's InstantSearch is properly initialized
Kapa modal doesn't open
- Check that the Kapa Widget is properly loaded by typing
window.Kapain the browser console - Add a safety check for
window.Kapaexistence before calling methods on it
Styling issues
- Inspect the button element using browser developer tools
- Ensure your CSS selectors match the actual class names in your HTML
- Check for any CSS conflicts with your existing styles
Next steps
After implementing this integration, monitor the Kapa usage analytics on the Kapa dashboard to see the effect of the Ask AI button on conversation volume.
You can find a complete working example in this CodeSandbox.