User tracking
Kapa's website widget includes user tracking capabilities that help you understand user engagement and improve your implementation. The widget does not perform user tracking by default, but you can enable it to gain additional insights about how users interact with your AI assistant.
As of June 25th 2025, Kapa's widget performs anonymous user tracking by default. Tracking unique users provides better analytics and user journey insights.
Local privacy regulations may require you to collect consent before you anonymously identify users. To comply with regulations, you can configure a consent prompt to allow users to opt-out, or explicitly disable anonymous tracking entirely.
Benefits of user tracking
User tracking provides valuable insights:
- User engagement: Measure how many unique users interact with the widget
- User retention: Analyze how often users return to ask questions
- User journeys: Understand what individual users ask over time
- User profiles: Identify power users and their common questions
Anonymous user tracking
When enabled, Kapa's website widget assigns an anonymous unique ID to each user
who asks questions. This ID is stored in a first-party cookie named
kapa_web_id. Since this is a first-party cookie:
- It's restricted to your domain only
- It's automatically included with requests to your own domain but not sent to any external sites
- It enables consistent user identification across different subdomains of your website
- It helps track user journeys without collecting personally identifiable information
The anonymous ID contains no personally identifiable information but allows the Kapa platform to provide meaningful analytics by:
- Providing aggregate metrics about unique users
- Tracking user retention rates
- Enabling conversation analysis by individual users
For users in regions governed by privacy regulations like GDPR, you must obtain explicit consent before tracking user interactions. Kapa provides options to manage compliance, including consent prompts and conditional tracking.
Configuration
Disabling user tracking
Kapa's website widget identifies and tracks users anonymously by default. To
disable the user tracking, set the data-user-analytics-cookie-enabled
parameter to "false".
<script
  async
  src="https://widget.kapa.ai/kapa-widget.bundle.js"
  data-website-id="XXX-XXX-XXX"
  data-user-analytics-cookie-enabled="false"
></script>
Adding a consent prompt
To help with compliance requirements, configure a consent prompt before users submit questions:
<script
  async
  src="https://widget.kapa.ai/kapa-widget.bundle.js"
  data-website-id="XXX-XXX-XXX"
  data-consent-required="true"
  data-user-analytics-cookie-enabled="true"
  data-consent-screen-title="Help us improve our AI assistant"
  data-consent-screen-disclaimer="By clicking 'Allow tracking', you consent to anonymous user tracking which helps us improve our service. We don't collect any personally identifiable information."
  data-consent-screen-accept-button-text="Allow tracking"
  data-consent-screen-reject-button-text="No, thanks"
></script>
Custom user metadata
In addition to anonymous tracking, you can associate specific user information with conversations when available:
window.kapaSettings = {
  user: {
    uniqueClientId: string;
    email: string;
    metadata: {
      company_name: string;
      first_name: string;
      last_name: string;
    }
  }
}
When collecting custom user metadata like emails or unique IDs, ensure you have appropriate consent mechanisms in place, especially in regions with privacy regulations.
Connecting user identities across platforms
After setting up custom user metadata, you can take advantage of Kapa's ability to maintain consistent user profiles across different touchpoints.
Users in Kapa can have multiple identifiers (anonymous IDs, custom IDs, and email addresses), which creates several advantages:
- Track the same user across documentation, help forums, and other platforms
- Start with anonymous tracking and enrich user profiles as they identify themselves
- Access a user's full interaction history regardless of where they started
Example scenario:
- A new user discovers your documentation and asks a question anonymously (tracked via cookie)
- The same user later logs into your help forum where you've set the
emailattribute - Kapa recognizes the user through their anonymous ID and associates both interactions with a single user profile
- All future interactions, whether anonymous or identified, contribute to the same user profile
This identity resolution helps provide continuity in user support and more accurate analytics.
Viewing user analytics
Team members and administrators with access to the project on the Kapa platform can analyze user activity and conversation data:
- Users dashboard: Navigate to Users in the left sidebar to view all tracked users, their activity metrics, and conversation history
- User filtering: Search for specific users by ID or email, or filter to show only users with email addresses
- Conversation analysis: Click "View conversations" for any user to see their complete interaction history
- User context in conversations: When reviewing conversations, user IDs are displayed in the details panel, allowing you to see which user submitted a question
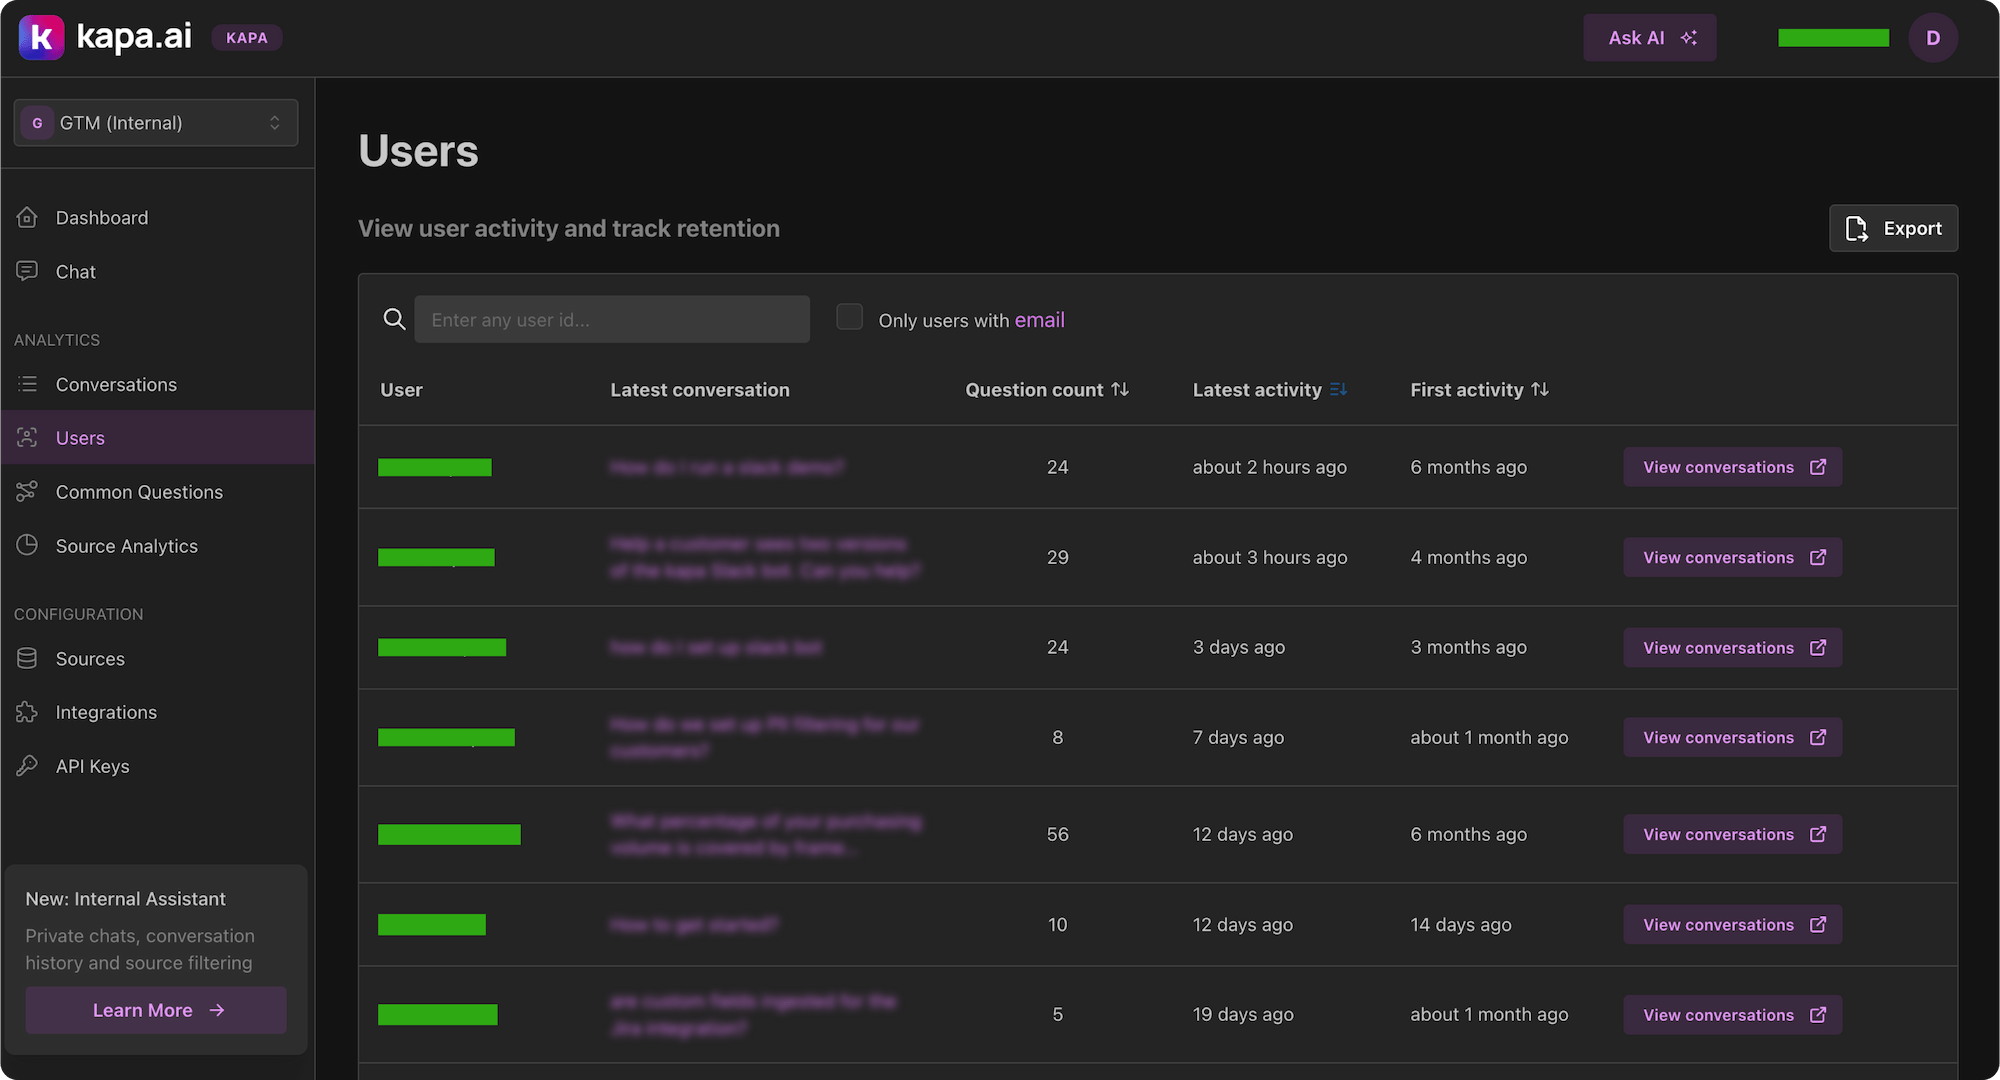
You can also use the Export feature, available on both the Users and Conversations screens, to export conversation or user data as CSV for processing in external systems.
Recommended implementation
For most widget deployments, consider:
- Enable anonymous tracking for basic analytics
- Implement a consent mechanism appropriate for your user base
- Add custom user metadata when available (after obtaining consent)
- Clearly communicate your tracking practices in your privacy policy
This approach balances valuable insights with privacy compliance requirements.