Quickstart
In this quickstart, you deploy the Kapa agent to your Slack workspace and ask it your first question in a channel.
By the end, you will have:
- The Kapa bot installed, invited, and enabled in your workspace.
- A channel where users get grounded answers by mentioning the bot.
Before you start
Before you start, you should have:
- A Kapa project with indexed knowledge sources. If you have not done this yet, complete Index your first source first.
- Permission to edit the Kapa project; if buttons in the platform are greyed out, contact a team admin.
- The Workspace Owner or Workspace Admin role in your Slack workspace, required for the enable command at the end.
Decide where to deploy Kapa
Two choices shape the setup: the integration type, a single channel or the whole workspace, and which channels Kapa should answer in.
- For communities and shared channels, we recommend a dedicated channel, named something like
#ask-ai, rather than adding Kapa to an existing help channel: users should be able to tell channels where humans answer apart from channels where Kapa does. - For internal teams, it is common to enable Kapa in existing internal channels, or workspace-wide so employees can also message it directly. Keep whichever channels you pick easy to discover.
If you are creating a new channel, create it now; you will need its channel ID during configuration.
Create the Slack integration
Navigate to the Integrations tab in the Kapa platform and create a new Slack integration, choosing the single-channel or global workspace type.
Configure the required options
- Slack team ID: the identifier of the Slack workspace to connect, required by both integration types. Find it in the URL when you are logged into Slack in your browser: the string after
/client/. For example, inhttps://app.slack.com/client/T1A2B3CDF/CXXXXXXX, the team ID isT1A2B3CDF. The Slack desktop app does not show URLs; open Slack in a browser instead. - Slack channel ID: the channel where Kapa should respond, required only by the Single Channel type. Right-click the channel name in Slack, select Copy link, and take the string after
/archives/: inhttps://yourteam.slack.com/archives/C1A2B3CDF, the channel ID isC1A2B3CDF.
If your organization has a Slack Enterprise subscription, the org ID is found the same way as the team ID, but it starts with E instead of T.
Everything else is optional and can be changed later; see Configuration.
Install the bot to your workspace
Install the Slack Bot from the install link.
Invite the bot to your channels
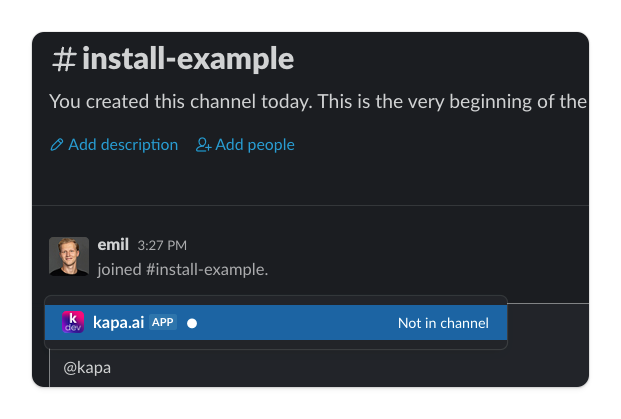
Invite the bot to every channel where it should respond: type @kapa.ai to mention it, then click Add to Channel. For a single-channel integration, only invite it to the channels you configured; for a global workspace integration, any channel or direct message works.
Enable the bot with a slash command
The final setup step confirms to the Kapa platform that you have authority over the channels where Kapa responds; this is why it requires the workspace owner or admin role.
-
For a single-channel integration, run this in the channel where the bot should respond:
/kapa-enable-channel <integration_id> -
For a global workspace integration, run this once from any channel the bot has been invited to:
/kapa-enable-workspace <integration_id>
The <integration_id> is the ID of the integration you created; copy it with Copy Integration ID in the integrations table. The bot confirms in Slack once the integration is enabled, and the Kapa platform shows the integration status as Enabled.

Verify the installation
In an enabled channel, mention @kapa.ai with a question about your product. The bot replies in a thread with an answer grounded in your knowledge base.
Summary
You created and configured a Slack integration, installed the bot, invited it to your channels, enabled it with a slash command, and verified that it answers from your knowledge base.
Next steps
- Using the bot: direct messages, channel questions, and pulling Kapa into existing threads.
- Configuration: forum auto-reply mode, user tracking, and message customization.
- Customizations: tune behavior and tone across integrations.