Index a source in the dashboard
In this quickstart, you add your first source to a Kapa project and watch it become searchable. No code is involved. It is intended for developers evaluating agentic retrieval and assumes no prior Kapa experience. If you prefer to have a coding agent do this for you, follow Set up with a coding agent instead.
By the end, you will have:
- A website crawled, parsed, and fully indexed in a Kapa project.
- An index ready for agentic retrieval: the next quickstart hands it to an AI agent as a search tool.
The quickstart uses the Website Crawl source because it needs nothing but a public URL, where most other connectors require an account on an upstream system, which would make this more complicated. It crawls the Kapa documentation so you can follow along exactly as shown, but any site works, including your own. Kapa supports 20+ other source types, including ticketing systems, community threads, and file uploads.
Definitions
- A project is one search space: when you perform retrieval, you pick a project to retrieve over, and you search everything indexed in this project.
- A source belongs to exactly one project, and a project can have many sources. Each source configures, through one of the prebuilt connectors, how to ingest knowledge from one specific place: a Website Crawl source fetches and keeps in sync one website, a GitHub Issues source does the same for the issues of one repository.
Before you start
Before you start, you should have:
- A Kapa account.
- Permission to edit the project's sources. If the Add source button is greyed out, ask a team admin to grant it.
- A public website to crawl. The examples use the Kapa documentation at
https://docs.kapa.ai; you can follow along with it or bring your own site.
Create the source
- Open app.kapa.ai and select your project.
- Navigate to Sources (under Configure in the sidebar) and click Add source.
- Select Website crawl as the source type. This creates the source and opens its setup page.
- Give the source a name and click Continue.
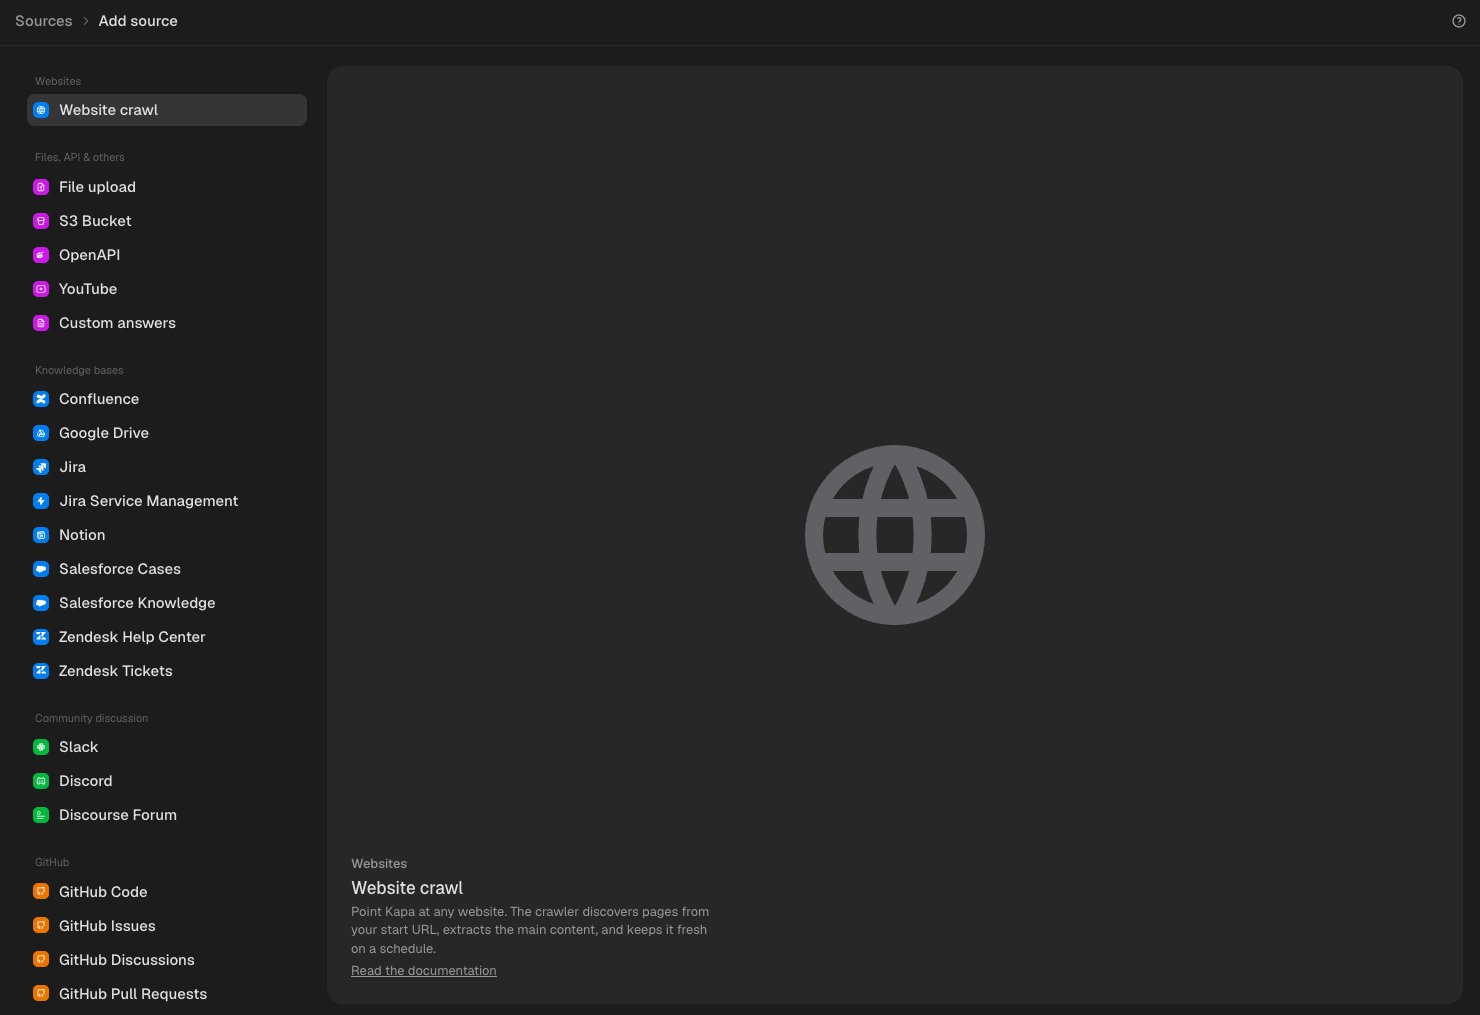
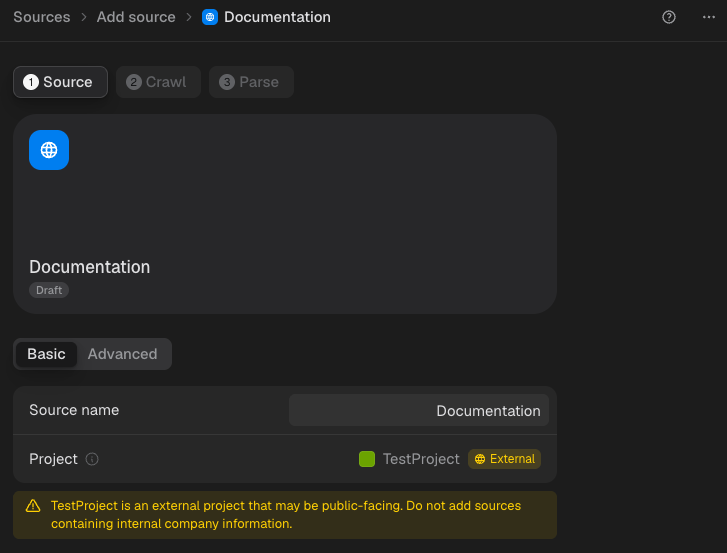
The setup now walks you through two more steps: first you run a preview crawl to configure which pages of the website to include, then you select which part of each page to actually use, so navigation bars, sidebars, and footers do not clutter the index. The next two sections walk through one step each.
Configure the crawl
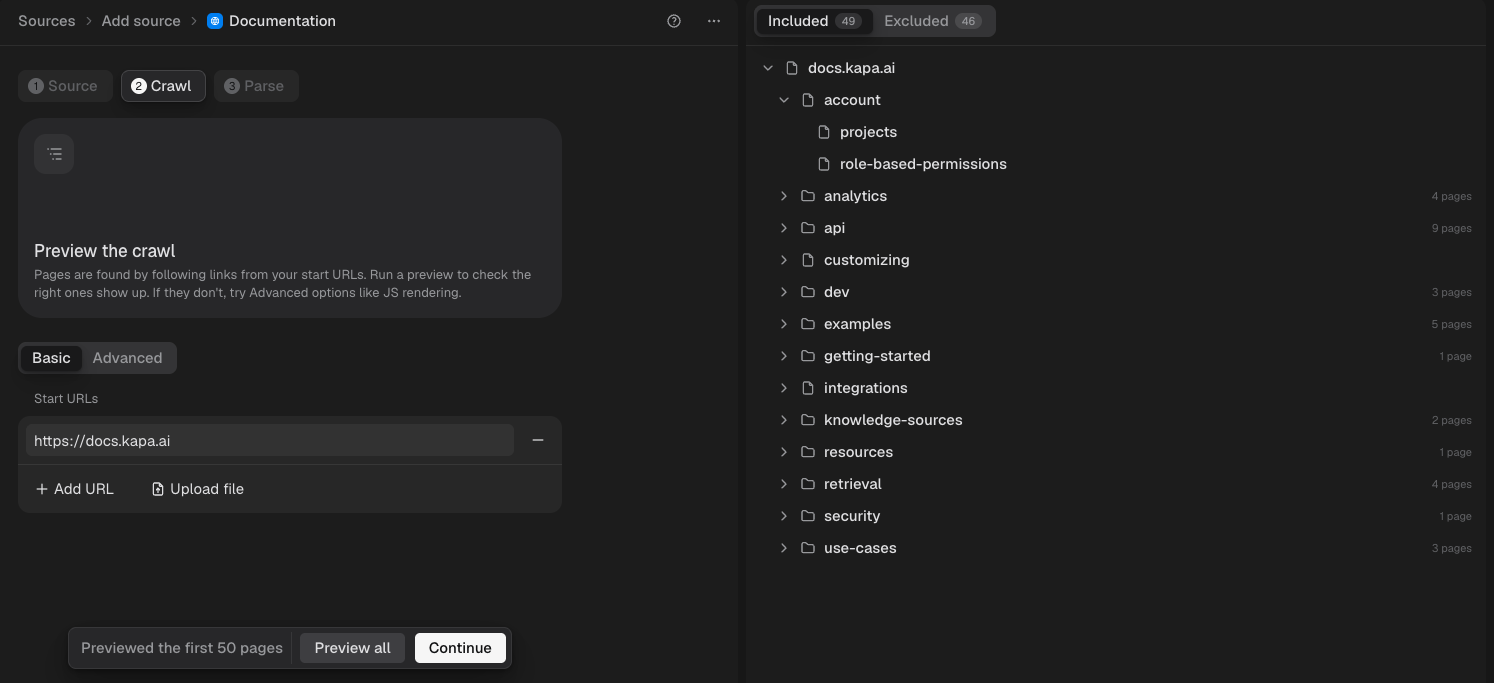
- Enter the Start URLs, in this walkthrough
https://docs.kapa.ai. The crawler discovers pages by following links and only keeps URLs that contain a start URL, so a start URL likehttps://example.com/docs/scopes the crawl to the documentation and keeps the rest of the site out of the index. - Click Preview. This runs a preview crawl without publishing anything: the Included tab lists the pages that will be indexed once the setup completes. By default, the preview only crawls the first 50 pages, which is usually enough to verify the configuration, but Preview all crawls the whole site if you want to see the full page list.
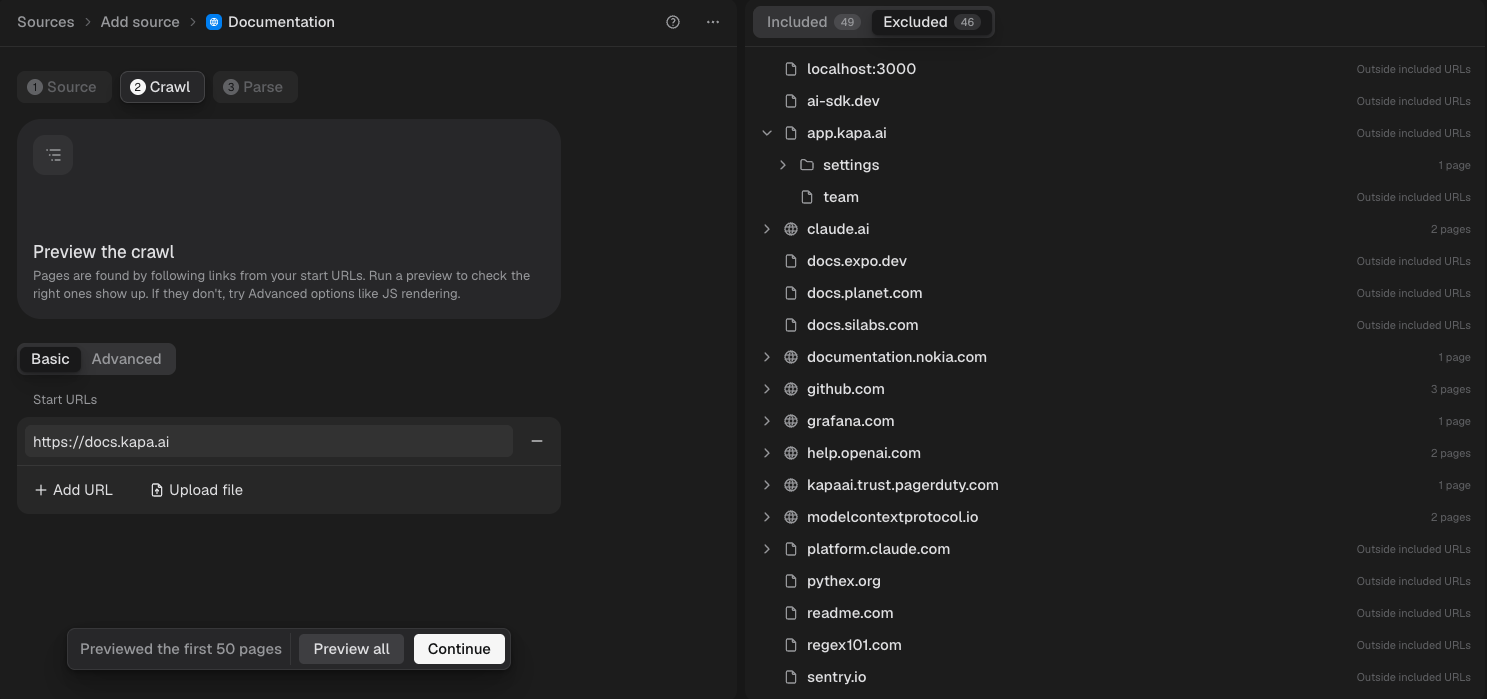
- Check the Excluded tab as well: these are pages the crawler also found but will not include, each with the reason it was left out. The reasons cover both pages your configuration excludes and pages that encountered errors during the crawl. Exclusions are usually correct behavior: below, almost every entry reads Outside included URLs, because these are URLs that are linked from the Kapa documentation but are not part of it, which is exactly what the start URL scoping is supposed to keep out.
- The Website crawl is a powerful tool with many more configuration options for more complicated websites and setups, tucked away under the Advanced tab and documented on the Web Crawling connector page. For example, if the included list is empty or misses pages you expected, your site probably renders its content with JavaScript: enable Render JavaScript and run the preview again.
- Click Continue.
Parse the content
The last step lets you try content selection on the pages you just crawled: you pick a selector, and the preview shows the content it selects from each page as Markdown, the format in which it will be indexed. Your goal is clean Markdown, meaning the actual content is all there and the unnecessary visual elements you do not want in it, such as navigation bars, sidebars, and footers, are gone.
- Enter a Content selector: the CSS or XPath selector of the main content element. Look for one that works across the pages you just crawled, not just on a single page. For the Kapa documentation, a Docusaurus site, it is
article .theme-doc-markdown; on most modern documentation sitesmainorarticleworks. Find the right one by right-clicking the text of a page and inspecting it with your browser's developer tools. - The preview converts as you type: page through the previewed pages with Previous page and Next page and check that the Markdown stays clean across several pages.
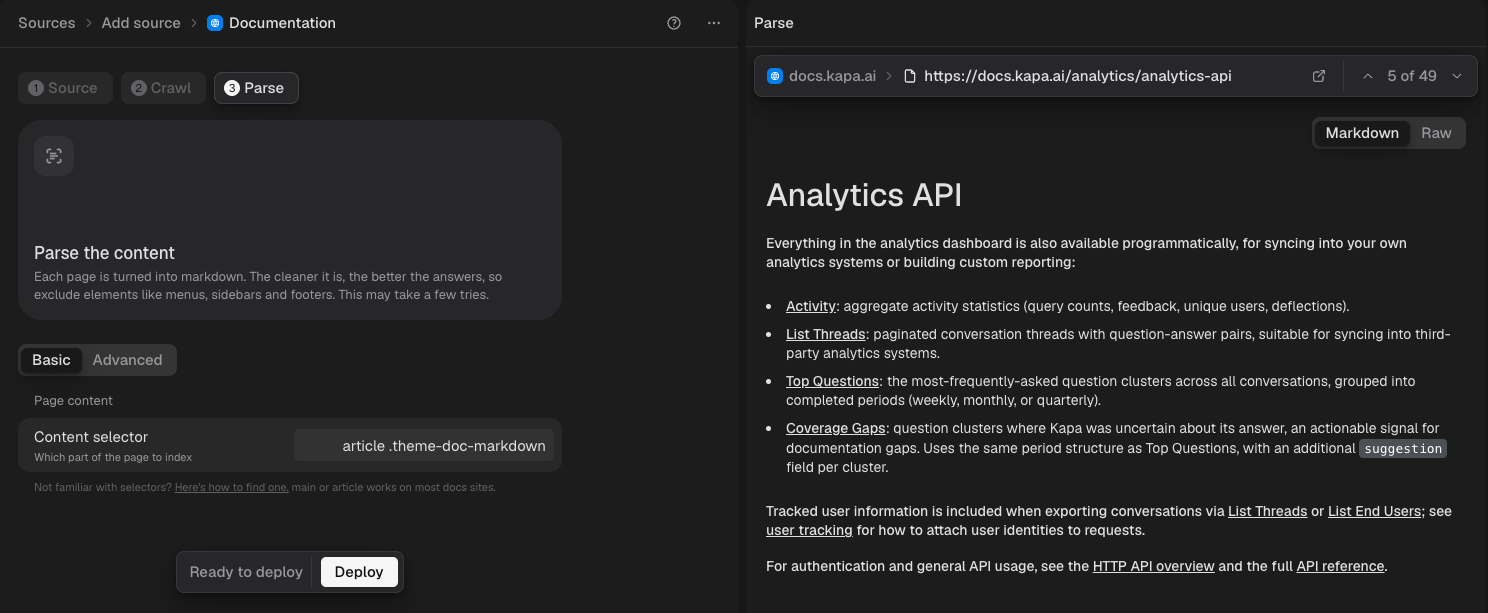
- Click Deploy. This concludes the preview and starts the real crawl with the configuration you just put together. Your first deployment publishes directly, because you have just reviewed the result yourself; later, when Kapa's automatic daily re-crawls detect large changes on your site, updates are held for your review before they go live.
Wait for ingestion
Back in the sources table, the source row first shows the Initial ingest status while the crawl runs, with a running count of the pages it has found so far:

The crawled pages are then deployed to your knowledge base: the deployed count ticks up, with a spinner indicating that some updates are still being deployed. A typical documentation site of a few hundred pages completes within minutes; large sites take longer.

When the spinner disappears, ingestion is finished: the row shows the final page count, and every one of those pages is now indexed and searchable.
Next steps
Your knowledge base is live. Continue with Connect an AI agent to your knowledge to let an agent search what you just indexed and ground its answers in it.
- HTTP API: call retrieval directly and get the raw chunks as JSON.
- Knowledge sources: the full connector catalog, refreshes, and source management.