Add documentation search to your MCP server
Your MCP server exposes your platform's tools, but a large share of what agents need from it is not an API call: it is an answer about how your product works. In this tutorial, you add documentation search to the MCP server you already ship, by proxying a Kapa hosted MCP server behind it. Your users keep connecting to one server (yours) and get both:
- Your native tools (execute commands, query product data, run workflows, update settings, and so on).
- Search over your documentation and other knowledge sources, served by Kapa.
The tutorial uses FastMCP as the concrete implementation, but the same proxy pattern applies in other MCP server frameworks. The full example lives here: kapa-ai/fastmcp-proxy-example.
By the end of this tutorial, you will have:
- An MCP server running locally that serves a native tool and Kapa's documentation search side by side.
- Both tools verified and called from the MCP Inspector.
- The composition pattern to apply in your production server.
What is proxying?
In MCP, clients discover and invoke capabilities through standardized protocol methods like tools/list, tools/call, and resources/read.
Proxying means your MCP server acts as an intermediary:
- To the client, it looks like a normal MCP server.
- Behind the scenes, it forwards some (or all) MCP requests to another MCP server, then relays the response back to the client.
In this example, your server forwards requests to Kapa’s hosted MCP server, so Kapa’s agentic retrieval shows up alongside your native tools.
┌───────────────────────────────────────--─┐
│         Your MCP Server                  │
│                                          │
│  • get_status (native)                   │
│  • search_your_product_knowledge_sources |──► Kapa hosted MCP server
│                                          │
└───────────────────────────────────────--─┘
When should you proxy?
Proxying is a good fit when you want to:
- Keep one installation for end users (Cursor, Claude Desktop, etc.)
- Bundle your product tools + knowledge retrieval behind one endpoint
- Add custom behavior around Kapa tools (auth, logging, filtering, routing)
Before you start
You need:
- Docker
- A Kapa project with a hosted MCP server configured
(and an API key you can use server-side)
If you do not have a hosted MCP server yet, follow Set up the MCP server, then come back here.
Clone and run the example
Clone the repository and create your .env file:
git clone https://github.com/kapa-ai/fastmcp-proxy-example.git
cd fastmcp-proxy-example
cp env.example .env
Edit .env with your hosted MCP server credentials from Kapa:
KAPA_MCP_SERVER_URL=https://your-project.mcp.kapa.ai
KAPA_API_KEY=your-kapa-api-key
Keep your
KAPA_API_KEYserver-side. Do not embed it in client applications.
Now run the example:
docker compose up
This starts two containers:
- MCP Server (
http://localhost:8787):- a small native tool (
get_status) - Kapa tools mounted via a proxy
- a small native tool (
- MCP Inspector (
http://localhost:6274): a web UI to browse and test MCP tools
Verify in the MCP Inspector
Open the Inspector:
- Go to
http://localhost:6274. - The server URL should be prefilled. Click Connect.
- Go to the Tools tab.
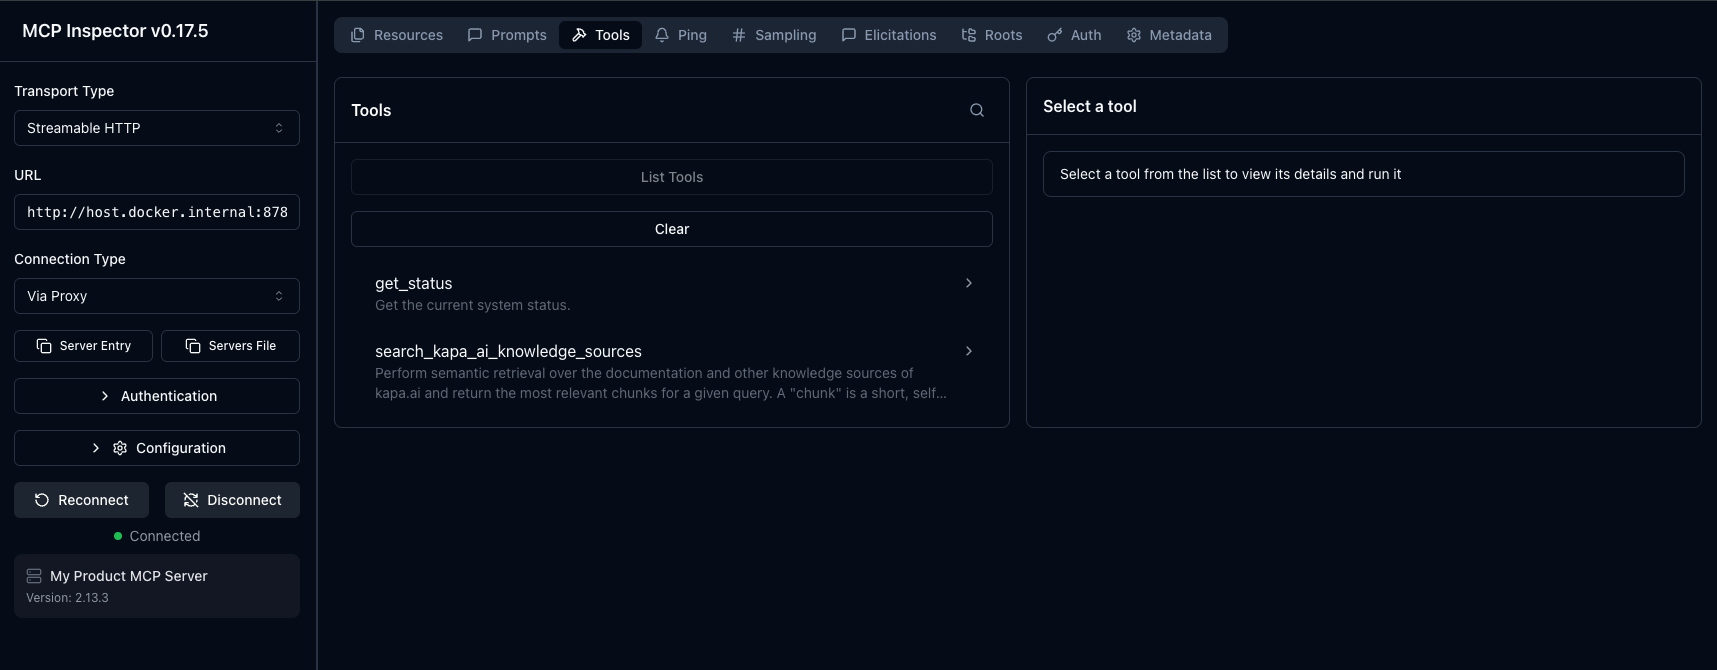
You should see:
get_status: your native toolsearch_your_product_knowledge_sources: proxied from Kapa
Call both tools
In the Inspector’s Tools tab:
- Call
get_status. You should get something like{"status": "healthy"}. - Call
search_your_product_knowledge_sourceswith a query your documentation can answer, for example:query: "webhooks rate limits"query: "SSO setup"query: "how to rotate API keys"
Understand how it works
At a high level, your server becomes the single MCP endpoint your users connect to.
Inside that server, you expose two kinds of capabilities:
- Native tools implemented by your server (execute commands, query product data, run workflows, etc.)
- A proxied connection to Kapa’s hosted MCP server, so your server can forward certain MCP requests upstream and return the results to the client
In practice, this is just server composition: your server “mounts” a proxy server, and FastMCP presents everything as one combined MCP server to the client.
Here is what that looks like in code:
import os
from fastmcp import FastMCP

mcp = FastMCP(name="My Product MCP Server")

# Your native tool
@mcp.tool
def get_status() -> dict:
    return {"status": "healthy"}

# Create proxy to Kapa's hosted MCP server
kapa_proxy = FastMCP.as_proxy({
    "mcpServers": {
        "kapa": {
            "url": os.getenv("KAPA_MCP_SERVER_URL"),
            "transport": "http",
            "headers": {
                "Authorization": f"Bearer {os.getenv('KAPA_API_KEY')}",
            },
        }
    }
})

# Mount Kapa's tools into your server
mcp.mount(kapa_proxy)
Summary
In this tutorial, you:
- Ran a FastMCP server that mounts a proxy to a Kapa hosted MCP server.
- Verified in the MCP Inspector that your native tool and Kapa's documentation search appear as one server.
- Called both tools and saw the composition pattern to apply in your production server.
Next steps
- Customize the MCP tools: rename the search tool or adjust its description for your users' agents.