Widget best practices
How you deploy your Ask AI assistant has a large impact on how many of your users discover it and ask questions. The widget can be configured to fit almost any page, and a few deliberate choices around placement, styling, and entry points go a long way toward increasing engagement.
This page collects patterns we see in the most effective deployments, with real-world examples and how to set each one up.
What makes a great widget deployment
The best deployments tend to share the same qualities. A great Ask AI assistant:
- Is front and center: users see it before they go looking for it
- Has multiple entry points: it's reachable from more than one place
- Goes beyond the docs: it's available wherever users have questions
- Feels native to your page: it looks and behaves like part of your product
- Uses high-contrast colors: it stands out from the surrounding UI
- Is integrated into search: answers surface directly where users already look
The sections below walk through each of these in turn, with an example and setup guidance.
1. Front and center
Place Ask AI as a hero element on the page rather than as a small floating widget or a single item in a nav bar. When the assistant is one of the first things users see, they reach for it before they start searching through links.
This is one of the highest-impact changes you can make. One customer moved their deployment from a widget in the bottom-right corner to a front-and-center element and saw more than a 200% increase in usage.
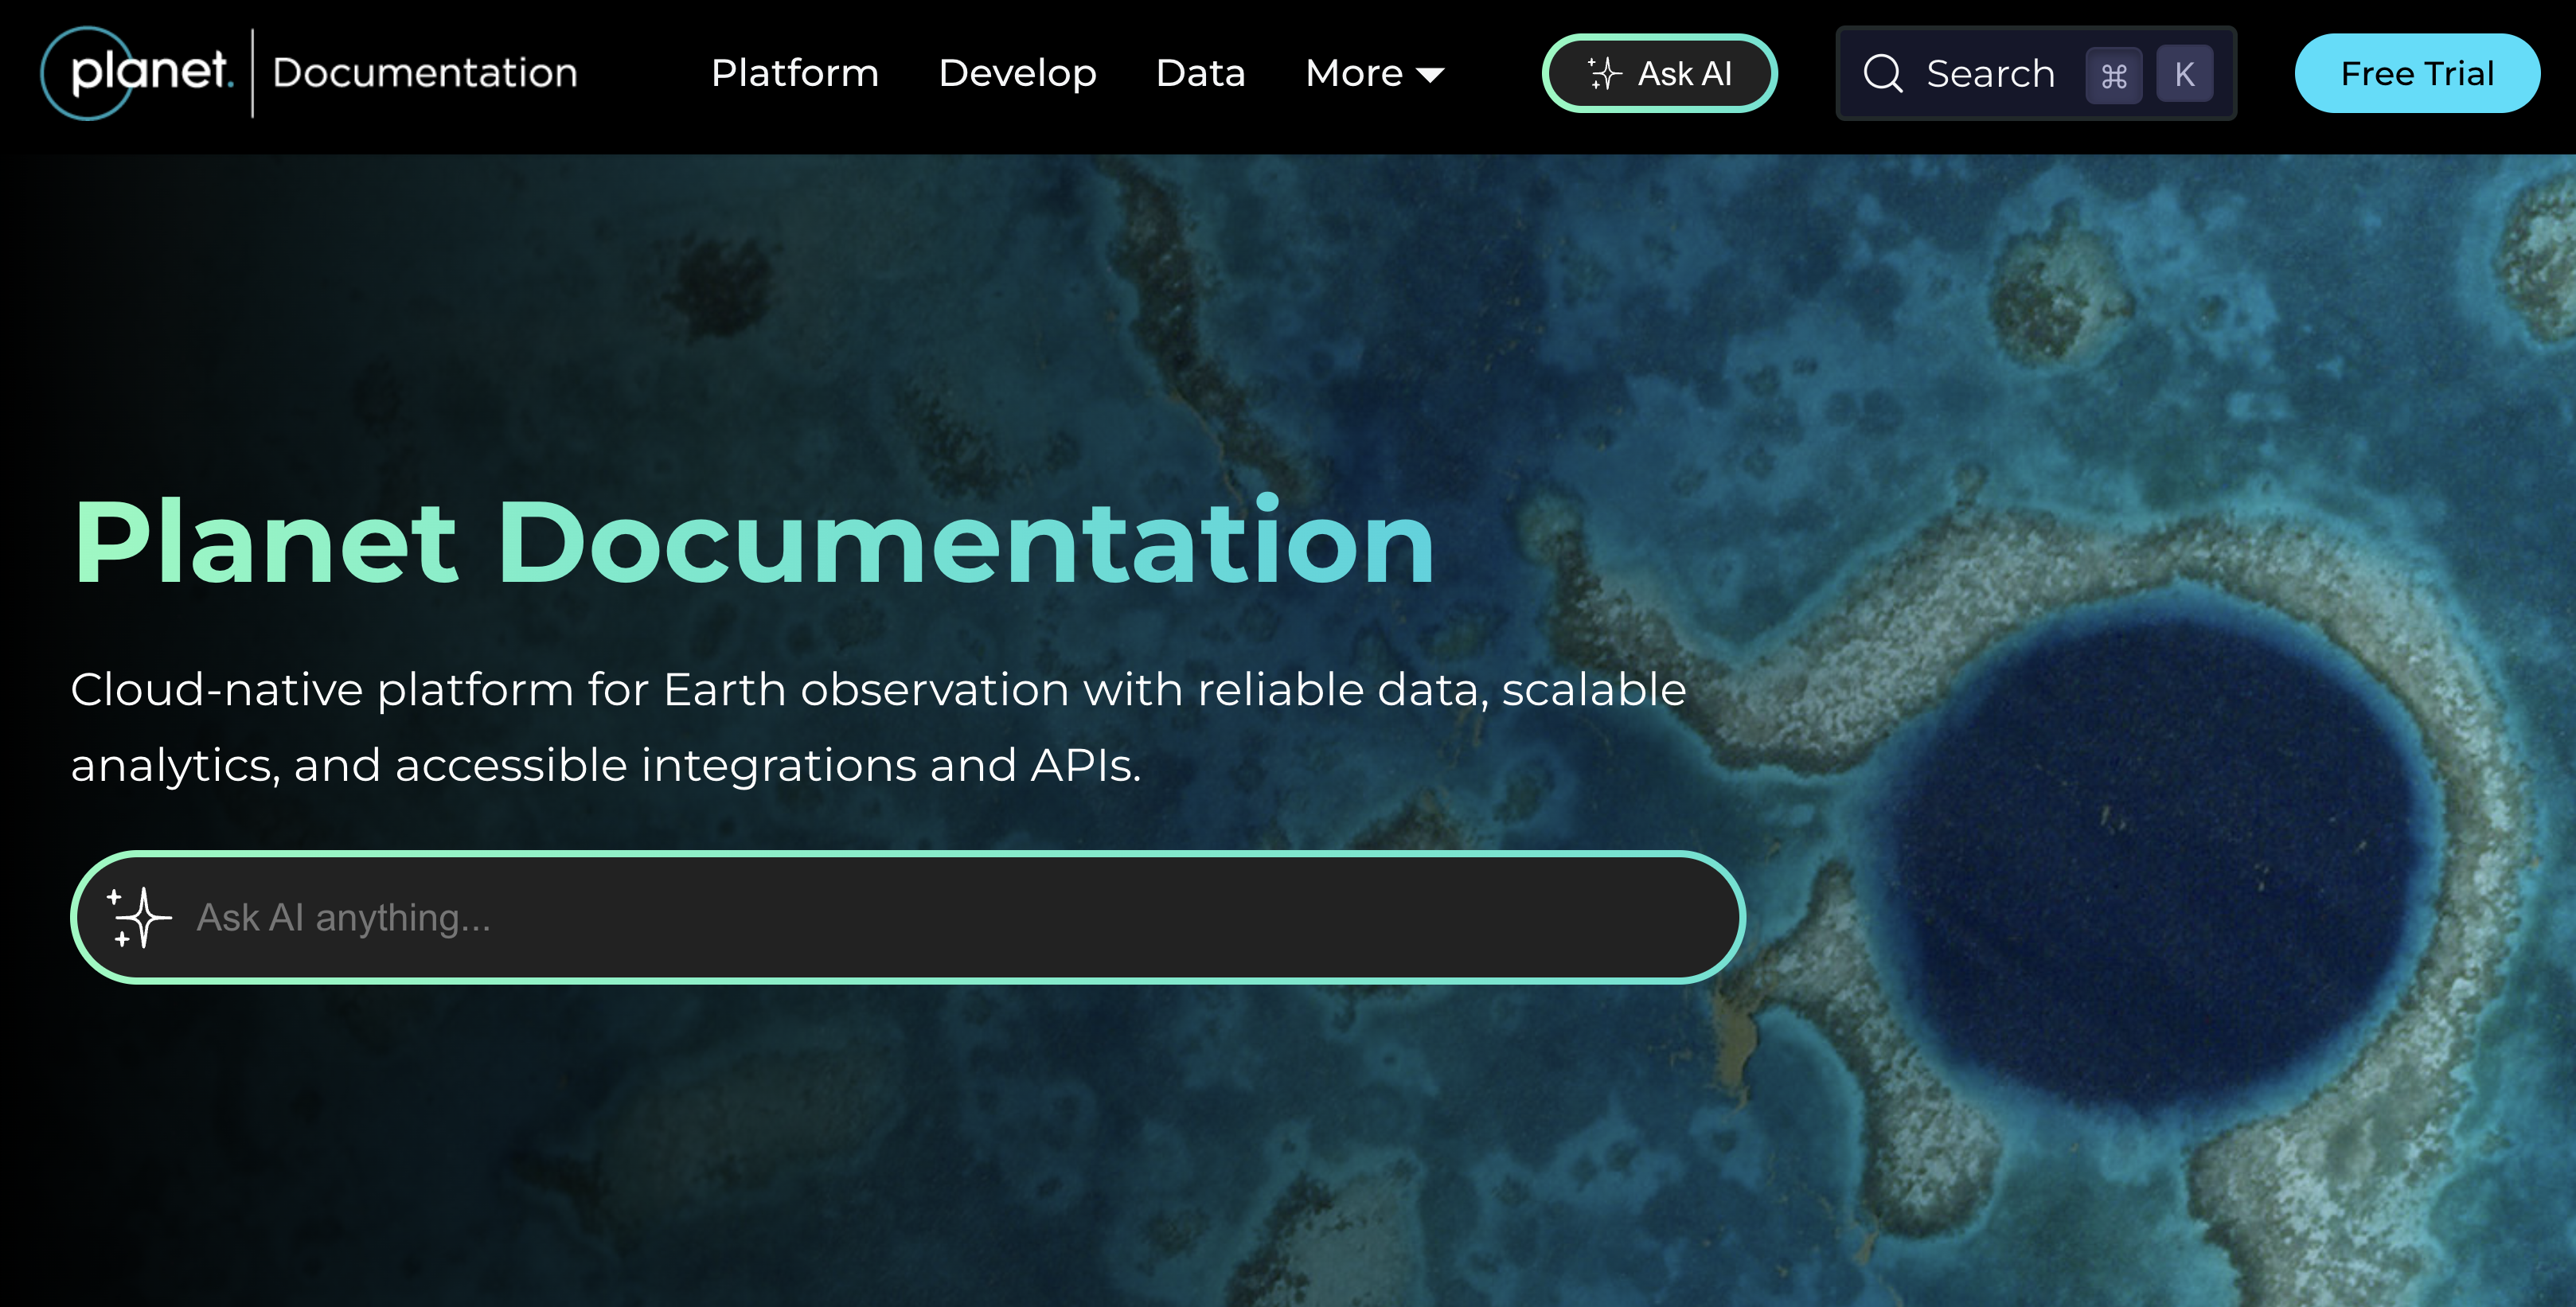
Source: Planet documentation
How to set it up: Add your own button anywhere on the page and call the
window.Kapa.open() JavaScript function when it's clicked:
<button onclick="window.Kapa.open()">Ask our AI assistant</button>
See the JavaScript API reference for the full list of functions you can call.
2. Multiple entry points
Adding more than one entry point ensures users don't miss the assistant. A common and effective pattern is to combine a front-and-center element with the standard floating widget and an "Ask AI" button in the site header.
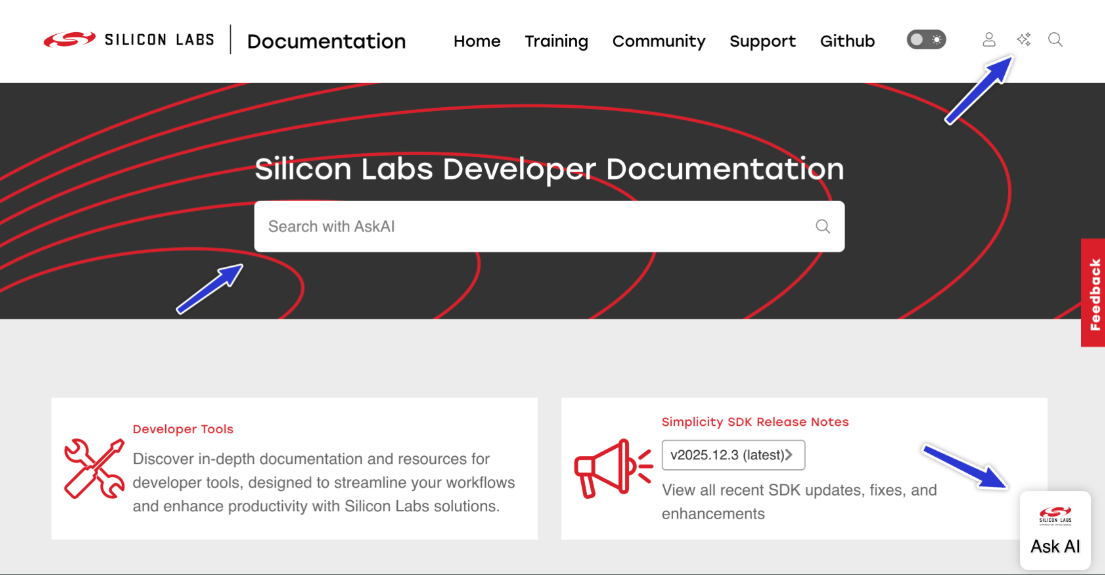
Source: Silicon Labs documentation
How to set it up: Combine a front-and-center trigger with the standard widget.
Deploy the widget as usual with the installation script, then call
window.Kapa.open() on any custom button:
<script
  async
  src="https://widget.kapa.ai/kapa-widget.bundle.js"
  data-website-id="YOUR-INTEGRATION-ID"
  data-project-name="Your Project"
  data-project-color="#6306B6"
  data-project-logo="https://example.com/logo.png"
></script>

<button onclick="window.Kapa.open()">Ask AI</button>
To trigger the widget from a custom element without writing JavaScript, you can
also use the data-modal-override-open-selector parameter. Refer to the
widget configuration reference for
more options.
3. Beyond the docs
Ask AI doesn't have to live only in your documentation. Placing it on your main website, marketing pages, or community forum reaches users who haven't opened the docs yet, and provides immediate answers wherever questions come up. Companies like Convex and Camunda have deployed Ask AI beyond their documentation to capture questions wherever their users are.
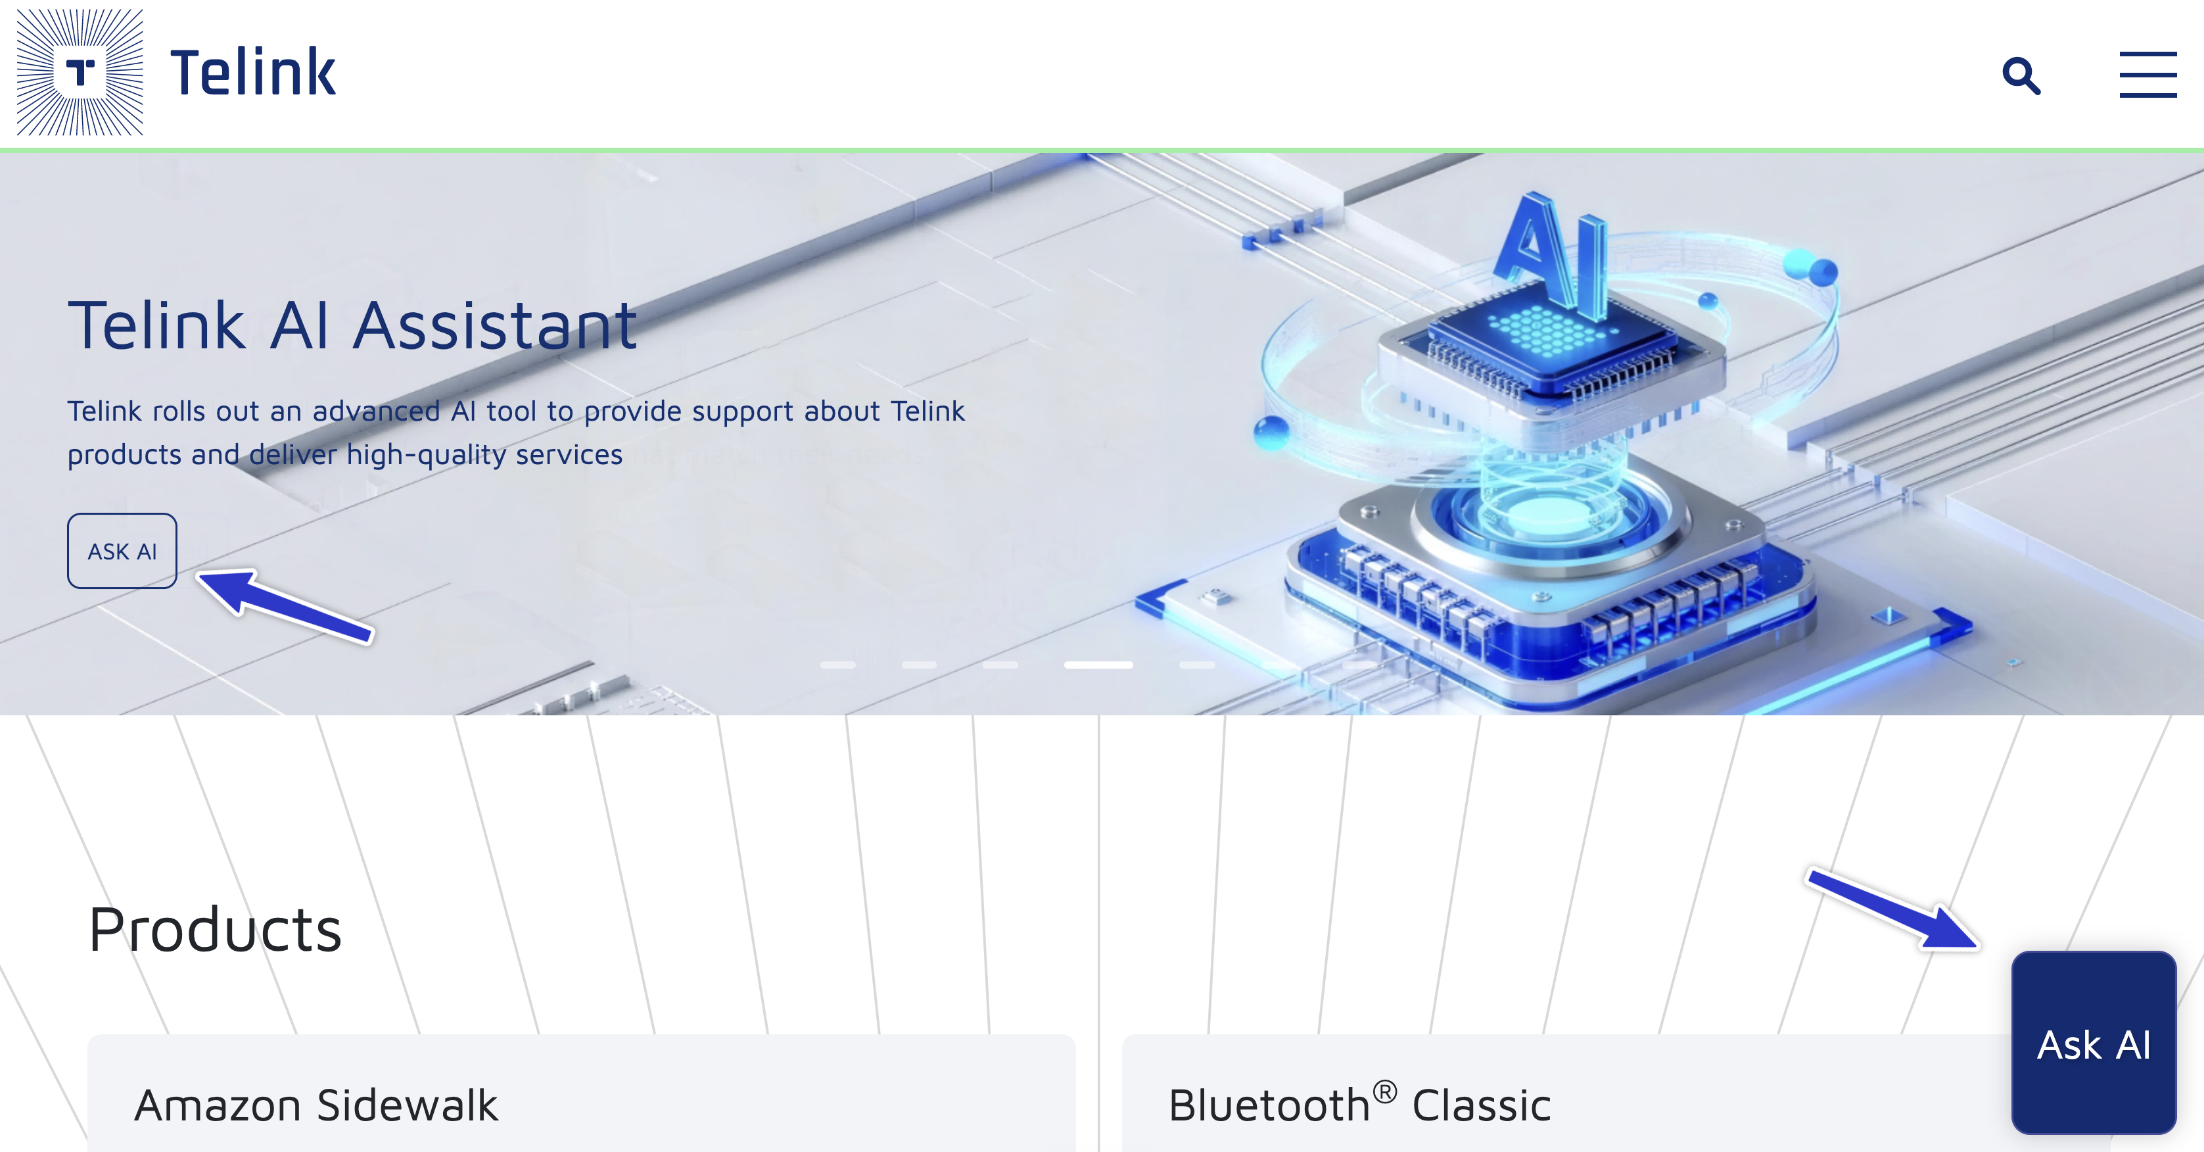
Source: telink-semi.com
How to set it up: Deploy the widget exactly as you would on your docs: add the installation script to the page. We recommend creating a separate widget integration for each major deployment so it's easy to tell conversations on different platforms apart. Remember to whitelist every domain you deploy to in the widget setup to avoid CORS errors.
4. Feels native to your page
The most polished deployments go beyond the standard configuration: custom branding, a renamed assistant, dedicated AI pages, or the assistant wired into every search touchpoint. The result feels like a built-in part of your product rather than a third-party add-on. Grafana, for example, built "Grot", a fully branded assistant with its own personality and dedicated page.
Source: Grafana's Grot
How to set it up: For full control over the look and behavior of the assistant, build a custom experience using one of these options:
- Chat SDK (
@kapaai/react-sdk): for a custom question-and-answer chat experience. It gives you two main building blocks:KapaProvider, which you wrap around your chat component to handle everything behind the scenes, anduseChat, which you call inside any component under the provider to access conversation state and actions (submit a query, stream the answer, reset the conversation, send feedback, and more). - Agent SDK (
@kapaai/agent-coreand@kapaai/agent-react): for a more advanced, agentic experience. On top of streaming chat and knowledge base search, it adds client-side tool execution, so the assistant can take actions in your app using the same APIs and permissions your users already have. It ships with a themeable React chat UI and panel, or you can run it headless with your own components. - API: for the highest degree of flexibility on any stack, build directly against the Kapa API with no SDK.
Each of these lets you build a completely custom experience using your own components and styling.
5. High-contrast colors
Make the Ask AI button or input visually distinct from the surrounding page, using contrasting colors or prominent sizing so users notice it at a glance.
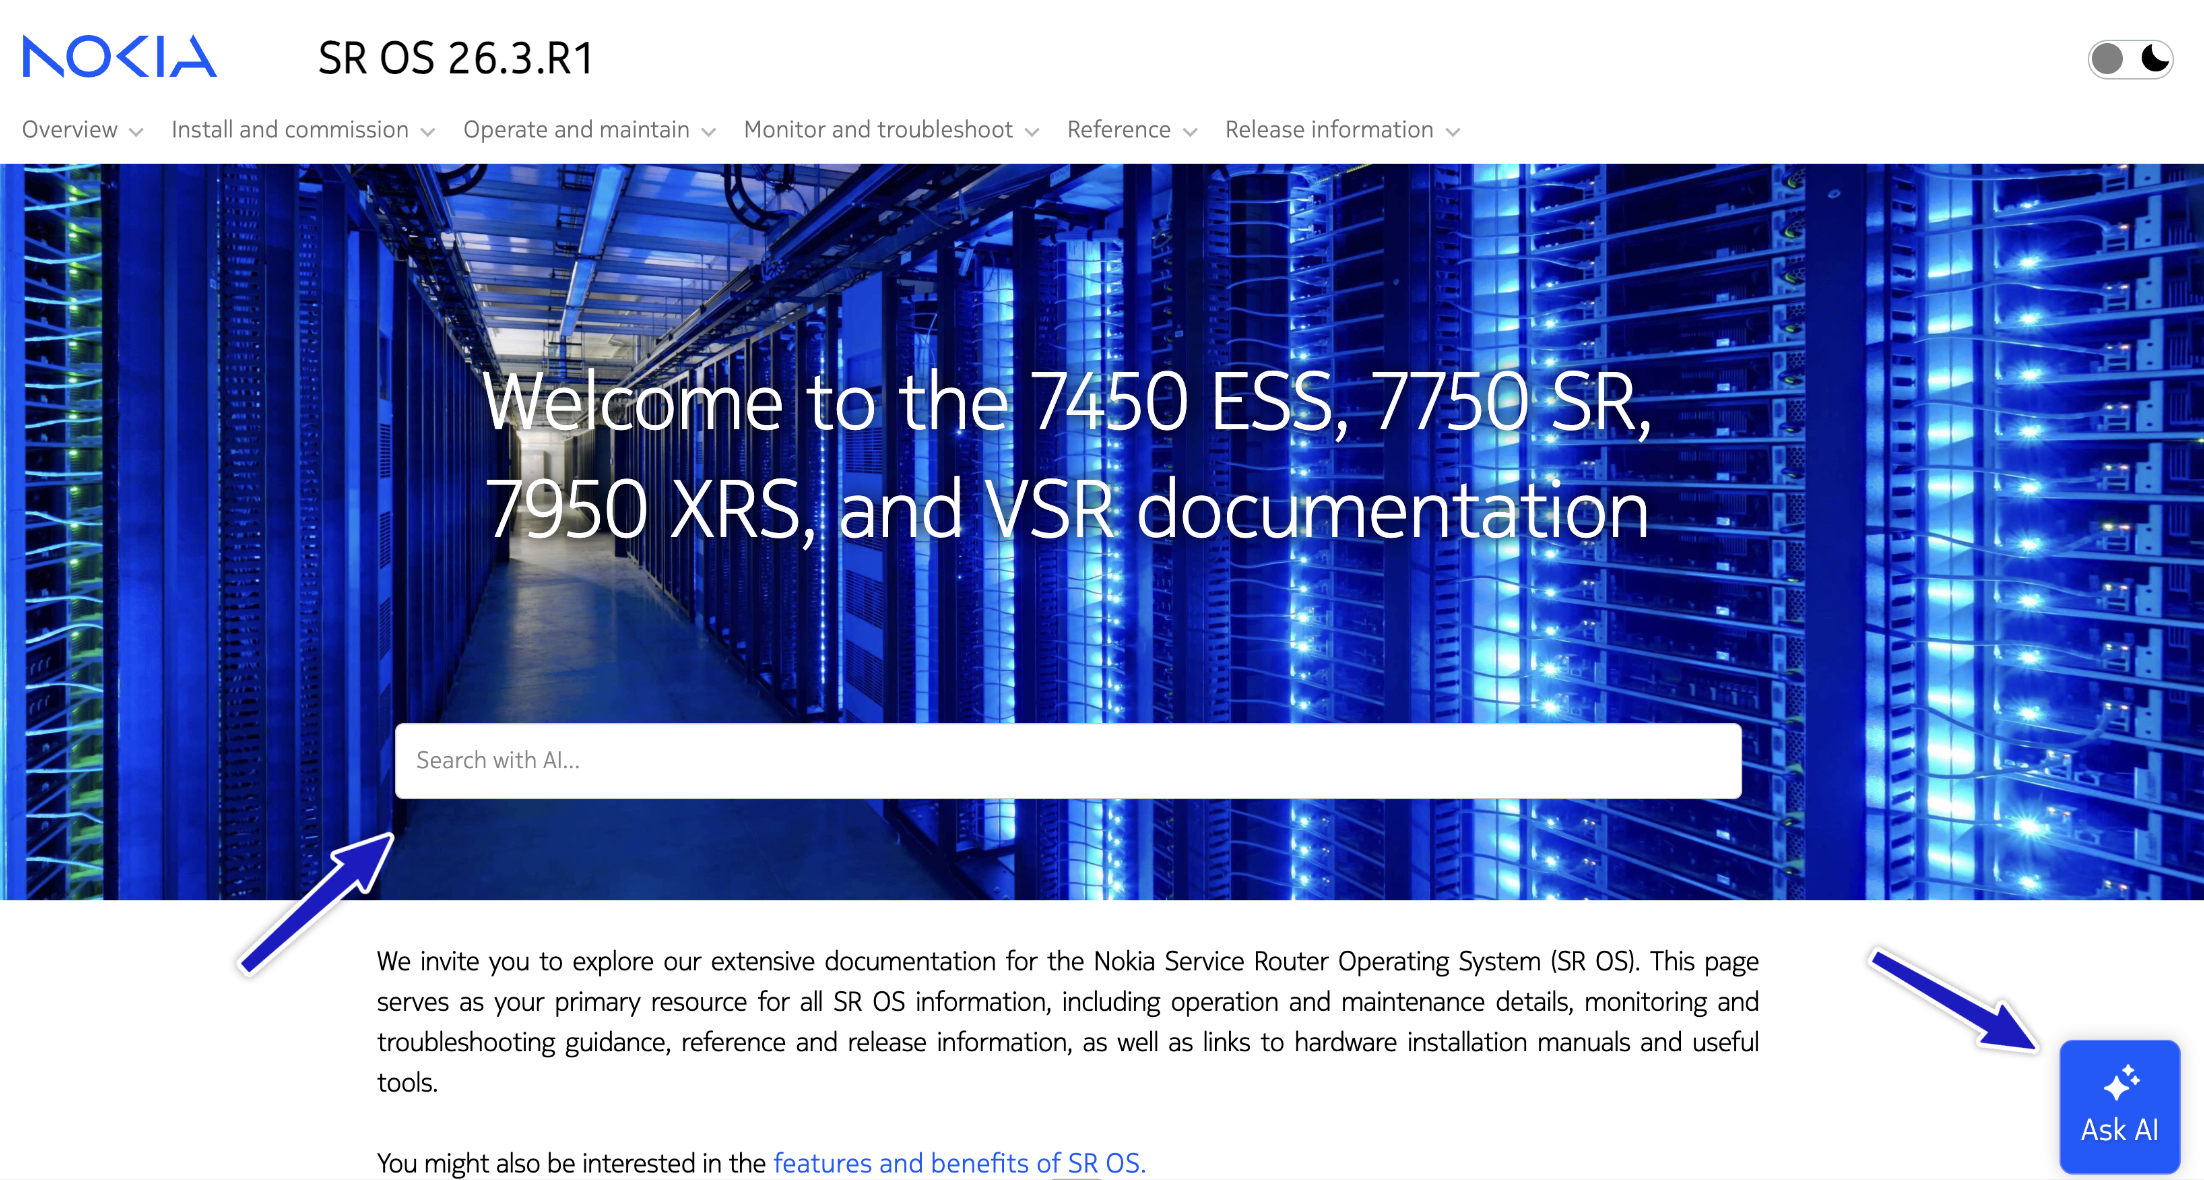
Source: Nokia documentation
How to set it up: Pick colors (as hex codes) that contrast with your background using the styling parameters below:
| Parameter | What it controls |
|---|---|
data-project-color | Brand/accent color (buttons, links, active states) |
data-launcher-button-background-color | Launcher button background |
data-launcher-button-label-color | Launcher button text/label color |
data-surface-color | Widget background |
data-text-color | Primary text color |
data-color-scheme | "light", "dark", or "auto" |
Most color parameters have a dark-mode counterpart that you set by appending
-dark (for example, data-project-color-dark). See the
component styles reference
for the complete list.
6. Integrated into search
Many documentation sites include traditional search alongside Ask AI. Keyword search often returns several results that still require investigation, whereas Ask AI can return a synthesized, contextual answer. Embedding Ask AI in the search experience means answers surface directly as users type, without browsing through links.
Source: Expo documentation
How to set it up: There are three ways to integrate with search:
- Use Kapa's built-in search mode: add
data-search-mode-enabled="true"to your widget script. See Search Mode. - Integrate with an Algolia search bar: follow the Algolia integration tutorial, which demonstrates how to integrate Kapa with React InstantSearch.
- Build a custom experience: use the Chat SDK to embed answers wherever you like (see Feels native to your page).
Monitor and iterate
Implementing the best practices above can significantly increase user engagement with your Kapa widget. Each additional touchpoint creates more opportunities for users to discover and benefit from Kapa's AI assistance.
After deployment, use the Kapa dashboard analytics to monitor how users interact with the widget. Pay attention to:
- Which pages generate the most widget interactions
- What types of questions users are asking
- How different entry points perform compared to one another
Use these insights to continuously refine your implementation strategy. The most effective widget deployments evolve based on actual user behavior data.
If you'd like a hand optimizing your deployment or have questions about any of the approaches above, reach out to our team at support@kapa.ai.